Friday 18 December 2015

Gingerbread Overload (Christmas Edition!)

Hiya guys so I'm back with a lovely new festive baking post. It had to be gingerbread and since I've never made gingerbread I used Zoella's recipe for gingerbread cupcakes, my own favourite buttercream recipe to ice the cakes and a BBC good food recipe for little gingerbread biscuits to top the cakes and to make so extra biscuits with! 


Okay for the Cakes  I used Zoellas Recipe posted below, I found it actually very easy to use and they turned out really well, so I have no real amendments for these little cakes!

I've linked her post below as it's Hugggggggeee


Okay for the Buttercream I used my own tried and tested recipe which I LOVE and it comes out perfect everytime. 

Ingredients 
1 cup of soften unsalted butter
3 cups of icing sugar
1 tsp of vanilla essence 
2 tbs of milk

Cream all the ingredients together and you'll have a lovely sweet and creamy buttercream. 


Okay for the gingerbread I found this recipe from BBC good food, which I thought could do with a bit more butter to bind the mixture together! 


I cut these into little circle to put on top of the cakes and make the rest into big star shapes but feel free to go mad! 


Hope you enjoy this post and it gets you in the christmas spirit!

Love Carly

xoxo

Friday 4 December 2015

Terry's Chocolate Orange Cheesecake Recipe (Christmas Edition!)

Hiya loves so I'm back with a new foodie friday post today....CHEESECAKE
Okay so this image is from online, I forgot to take a picture of mine, sorry but this looks pretty much identical to mine! 

This recipe is my fall back dinner party recipe, it's so easy to make and it's so very popular and I think chocolate and orange are just a lovely combination for christmas time so here goes...

Ingredients
1 Terry's chocolate orange
2 tubs of full fat cream cheese
1 Packet of HobNobs 
1 cup of butter (melted)
1 and 1/2 cups of icing sugar 
3 teaspoons of sugar


1. Okay start by bashing your hobnobs into crumbs making sure there's no big biscuit chunks and that  you have a bowl of nice chunky crumbs!
2. Add in the melted butter and sugar gradually  and mix well, make sure the mixture looks damp throughout but not greasy and soaked, feel free to add more or less depending on how it looks. Pat this mixture into the bottom of a cake tin and thats you! 
3. Add to the two tubs of cream cheese in a bowl and add in the icing sugar gradually staring until it tastes sweet, you may not need all of it its personal preference but its essential to use the icing sugar as it helps set the mixture.
4. Melt about 3/4 of the chocolate and add gradually again this is to personal preference and depends on how chocolatey you like it. 
5.Add this on top of the crumb mixture and pop in fridge to set for two hours.
6. Use the remaining chocolate to decorate, I melted it this time.
7.ENJOY

Carly xx

*Side note, check out my Instagram (@carlymcleary) for loads of pictures of my cheesecake making I've made many over the years and you can edit this recipe and use any type of chocolate! 

Friday 13 November 2015

Victoria Sponge Biscuit Hearts

Hiya Lovlies, I'm sorry I know its been a while but I've been planning a lot of my christmas baking so didn't want to really bake too much, also uni deadlines uhhhhh! However I made these cute little biscuits for a mid week treat and they went down very well!

Ingredients 

For the Biscuit   

2 1/2 cups of plain flour 
1 cup of butter 
1 1/2 cups of caster sugar 
1 Egg
2 tbs of milk
2 tsp of vanilla essence 
1 tsp of baking powder 


For the Filling 
1/2 a cup of butter
1 1/2 cups of icing sugar 
Jam of your choice.


Method
These little biscuits are so easy to make and so yummy, start by preheating your oven to 200 degrees Celsius. 
Okay start by creaming the butter and sugar together in a bowl. 
Gradually beat in the egg until the mixture is well formed. 
Sift in the dry ingredients 
Add the vanilla and the milk as need, Ie if the mixture is looking to dry and not binding, add the milk gradually as needed to make it form a big doughy ball.
Flour your surface and rolling pin and roll out the pastry to a fairly thin texture, this is your own preference on how thick you want the cookies to be but remember to adjust baking times accordingly. 
Cut out your biscuit shapes, I had a little heart one but using a drinking glass to make circular shapes is fine. 
Pop your little biscuits shapes onto a greased tray or baking paper and pop in the oven for 8-12 minutes until the biscuits have acquired a golden tinge. 

Okay for the mixture its really easy just cream the butter and icing sugar together for some yummy buttercream,
Once the biscuits have completely cooled and a teaspoon of jam and teaspoon of buttercream to the bottom biscuit. Layer another biscuit over the top and dust with icing sugar! 
Done!


Saturday 17 October 2015

Salted Caramel Cupcakes

Heloooo lovlies a nice little autumn banking recipe for you! I was inspired by Anna Saccade Joly's video the other day so had a bash at doing my own version.


You will need...
200g of Self Raising Flower 
200g of Caster Sugar 
200g of Butter
4 Eggs 
Two tablespoons of milk 
1 large bar of nutty milk chocolate (This is subjective, if you want to dark or no nuts or a bar and a half of chocolate go for it!) 
1 teaspoon of vanilla essence 
1 teaspoon of baking powder
Course sea salt

For the Icing...
One tin of caramel (Nestle is the one I used, but feel free to branch out)
2 cups of icing sugar 
100g of butter 


Method... 
1. Pre heat the oven to 175 degrees Celsius and line your cake tray with cases.
2. Cream the butter and sugar together in a bowl until light and fluffy.
3. Add in the eggs and mix well then fold in the flower, baking powder and vanilla. 
4. The mixture may seem a little thick which is why to add in the milk to make it a bit more gloopy, for want of a better word! Mix in a sprinkle of salt and mix well.
5. Add in your chocolate and mix until they're well distributed .
6. Put ice cream sized scoops of the mix into the cases and make sure they're about three quarters full.
7. Pop in the oven for around 12-17 minutes, until the cakes are well risen and golden. 
8. For the icing, mix all ingredients together, only half the caramel mind, a sprinkle of salt should go in here too! I prefer to use an electric whisk to make the icing more smooth.
9. Use the spare caramel and spread over the cakes when cool, before piping the buttercream onto them and tadaaaaaa
10. To decorate I added some grated chocolate and a spare square of chocolate on each. 


Hope you enjoyed this autumn baking post and I'll be back next Friday with another one!
Love Carly 
xoxo

Friday 18 September 2015

Banoffee Pie Recipe

Hey lovelies so back with a new recipe post, this is one of the easiest recipes I've ever posted and tastes amazing!


Ingredients 
250g Digestive biscuits 
75g butter 
2 tins of Nestle carnation caramel ( I know i cheated!) you can make your own however if you have time.
4 big bananas 
600ml of double cream 
A dusting of coco powder

Method
1. Have some fun and bash those biscuits, seriously beat them until they're a larger version of breadcrumbs, you'll know what i mean less powder but still a fine consistency. Melt the butter and mix well until all the biscuits are wet with the butter however don't look greasy. 

2. Pat the crumbs to create a base into your selected cake tin or bowl it doesn't matter too much what you use to make it in, it's fairly diverse with regards to that. 
3. Spread the caramel by spooning in a tea spoon at a time and mixing them together, without heavily mixing them as it'll lift the crumbs into the mix. Then spread the banana in rows around the tin.  For me I doubled up the mixture so then spread the second tin of caramel and repeated the process.

4. Finally the yummy part, whip the cream until thick and fluffy and spoon it on the top.

5. Finally dust the chocolate powder across.

6.  Cheeky tip, if you have leftover biscuits/caramel/cream/bananas, make mini deconstructed banoffee pies! Spread the caramel on the biscuit, add the banana and dollop on the cream! Enjoy


Hope you enjoy my little dessert its one I find myself siting over the bowl with a spoon in times of desperation! Oh my poor thighs!
Carly
xoxo


Saturday 5 September 2015

Banana, Carrot and Walnut Cake Recipe

Hey guys so sorry for the lack of posting recently what with getting back into a fitness routine and settling in at home again after my holidays, I haven't had time to post, However I'm back and ready to make your weekend better with this fabby recipe! 


Ingredients 

For the Cake...
175g Plain Flour
175g of Soft Brown Sugar
3 Eggs
1/2 a cup of sunflower oil
100g of Walnuts (chopped)
2 Bananas (Preferably ripe)
175g Grated carrot (I bought mine pre grated but feel free to grate them yourself)
1 tsp of Cinnamon 
1 tsp of Ground mix spice
1/2 tsp of Nutmeg
1 tsp Bicarbonate of Soda
1 tsp of Salt 


For the Icing 
75g of cream cheese
75g butter 
300g of icing sugar 
walnuts for decoration
1 tsp Vanilla essence

If you don't have a cup measure (sorry for being inconvenient), find a little converter here, which can help...    http://www.metric-conversions.org/volume/cups-to-milliliters.htm


Method 
1. Preheat the oven to 175 C and make sure to grease your cake tin
2. Mix the eggs and sugar together until they form a thick paste. Add in the rest of the ingredients, flour, bicarb, salt and walnuts first, then oil, then carrot and banana and finally the spices. In all honesty it doesn't matter what order you add the ingredients too much as long as they're all there!

3. Bake for an hour until a skewer comes out clean, it may take longer depeding on your oven.
4. For the icing mix the butter and cream cheese together before adding in the icing sugar, for a less stiff mixture using only half the suggested amount works too!
5.  Once the cake has cooled spread the icing over the top and decorate with chopped walnuts.
6. DIG IN 

Thanks for reading guys and hope you enjoyed this post don't forget to follow me on instagram and tag me in your baking creations...    (@carlymcleary). 


Love Carly xx

Friday 31 July 2015

Healthy banana and carrot cake cupcakes

So I've only got two weeks until my holidays and I'm not feeling particularly bikini ready, however these are lovely for a healthier desert substitute! I have a lot of spare carrots so decided to use them up and make a carrot cake, but as I'm being healthy I thought i'd use the hairy bikers healthy recipe, however I decided to change it to better suit the ingredients I have in my house and my personal tastes! Enjoy they, taste great...


 Ingredients 
2 carrots (grated)
1 Banana 
100 ml of extra virgin olive oil (the original said sunflower but I didn't have any and they worked fine so I would say either!)
100 g of soft brown sugar

200g self raising flour
2 tbsp of vanilla essence 
3 large eggs 

Method 
1. Pre-heat the oven to 180 degrees 
Beat the eggs in a bowl and add in the oil and flower 
3. Mash the banana (I usually do this with the back of a fork!), the add to the mix
4. Put in the carrots, vanilla and other spices you wish, cinnamon or nutmeg would work well, oh and nuts would be nice too if that's your thing!
5. Pop in the over for 15-20 minutes until they are golden and brown!
6. For decoration I sprinkled mine with icing sugar and nuts, so feel free to decorate however!
7. Eat them! 

Carly
xoxo

Friday 24 July 2015

Salted Caramel Brownies

Hey guys another foodie Friday post for you here this week I made Alexa Chung's Salted Caramel Brownie Recipe, If anyone watched the Celebrity bake off for comic relief I loved how relate-able Alexa was and how she couldn't really cook but these came out great! Here's the recipe with my few little tips...

My Attempt


Ingredients

For the salted caramel filling
For the brownies
To decorate

Preparation method

  1. Preheat the oven to 190C/180C Fan/Gas 5. Grease a 32x23cm/13x9in tin and line with parchment.
  2. For the caramel, put the sugar in a saucepan and melt over medium heat until dark brown in colour. Remove from the heat and carefully add the salt and half the cream. (CAUTION: boiling sugar is extremely hot. Handle very carefully.)
  3. Once the mixture has settled, add the remaining cream and butter. If the mixture is lumpy warm it over a low heat and stir until smooth. Pour into a jug to cool.
  4. For the brownies, sift the flour, cocoa powder and salt into a large bowl and set aside.
  5. Melt the chocolate and butter in a pan over medium heat, remove from the heat and allow to cool slightly.
  6. Whisk the eggs, sugar and vanilla extract in a large bowl until thick and pale. Whisk in the chocolate, then fold in the flour mixture until just combined.
  7. Pour half the batter into the tin and smooth the surface using a spatula. Add a thin layer of the caramel, making sure to leave the edges clean. Add the remaining batter and gently level the top. Bake for 25-30 minutes, or until a skewer inserted in the middle comes out with just a few moist crumbs. Allow to cool completely in the tin.
  8. Meanwhile, melt the white chocolate in a heatproof bowl set over a pan of simmering water (do not allow the bowl to touch the water). Leave to cool slightly then use a fork to drizzle it over the brownies. Leave the chocolate to set slightly before removing from the tin and cutting into 12 brownies.
source: http://www.bbc.co.uk/food/recipes/salted_caramel_brownies_33478


Okay so my tips from this recipe are as follows...
1. When melting the sugar it can get quite smokey so make sure you have the strongest extractor fan level on your oven, I still did but managed to set my fire alarm off! (does not encourage people to try your food)
2. Use more caramel, the recipe says to not put it near the edge however I think these would be even more delightful with caramel oozing out, because my attempt was more lightly flavored where I feel it would be more indulgent. 
3. I used milky bar white chocolate for the top and this turned out really well, i wouldn't worry about expensive chocolate for the topping. 


Hope you enjoyed this recipe and tips, I took mine into work and they were devoured in under thirty minutes flat! Make sure to send me your attempts and subscribe and comment with your own tips!
love Carly xx

Friday 10 July 2015

Classic Chocolate Chip Cookie Recipe

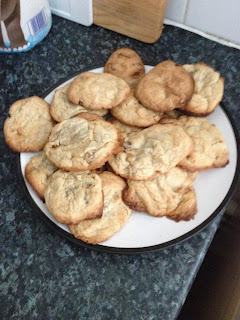
Hi guys so today I thought I'd share my chocolate chip cookie recipe, this is the first recipe I used to ever make cookies and from them I've switched this recipe up using Terry's chocolate orange (V.popular), Rolos and Milky bars as well as normal plain chocolate. I actually made them for my flatmates in freshers week and people from my entire block "popped" by to sample them!

This recipe is super easy and one I literally use all the time, I know it by heart now and It creates lovely chewy cookies going up to any size you wish really, I have actually made them into one giant cookie once because I had a lot of spare mixture. Millies eat your heart out!
Okay so for this recipe you will need....
250g of plain flour 
170g unsalted butter, melted
200g dark brown sugar ( Soft is best best but I've used demera before and that works too!)
100g Caster Sugar 
1 Egg 
1 Egg yolk
1/2 tea spoon of bicarb of soda 
1/2 table spoon of salt 
As much chocolate as you want! 
The original recipe I've taken this from (http://allrecipes.co.uk/recipe/4807/best-big--fat--chewy-chocolate-chip-cookies.aspx), suggests 325g of chocolate and I've used less than this before and it's been no problem. I wouldn't worry about baking chocolate either I use ASDA's own and that's just as nice.

Method 
1. Pre -heat the oven to 170 degrees Celsius and line or grease baking trays.
2. Cream together the butter and two sugars until they're well mixed.
3. Add the egg and egg yolk. 
4.  mix in the flour, salt, bicarb and vanilla and mix well
5. Finally add in your chocolate and mix well. The mixture should be kind of sticky but not totally wet.
6. Take two Tablespoons Full per cookie and drop them onto greased baking trays. You can flatten them if you want but by careful not to pancake them as they'll be too thin, either way is fine it'l just alter the shape of your cookie. 
7. Bake for around fifteen minutes until golden around the edges, they may not look entirely done in the centre but that's part of their cooling process. 
8. EAT THEM

My Terry's Chocolate Orange Variety

Okay guys hope you enjoyed this post, Ill be back next week with a new recipe, but I think another cookie recipe may be a bit boring and I'm making salted caramel brownies today, so think ill update you on that recipe next week,. 

Subscribe, like and comment away and make sure to check out my instagram for a sneak peak of the brownies,  love Carly xx

Friday 3 July 2015

Tripple Chocolate Cookies

Hi Guys and welcome to my first Foodie Friday. It's my plan to share a new baking recipe I've either tried or amend on a Friday, as when better to have a treat day than the weekend! 

This week, I'm sharing Tanya Burrs Tripple Chocolate Chip Cookie Recipe and my observations and little amendments. 

This is the original recipe...

To make 10 (rather large) cookies you will need: 
200g butter
300g caster sugar 
1 large egg
275g self-raising flour
75g cocoa powder
a little dash of milk 
a large bar of milk chocolate (Cadburys is my fave)
a large bar of white chocolate
a large bar of dark chocolate (this is totally optional - only add if you are a dark choice fan. Sometimes I add Daim bars instead of dark choc for a yummy toffee crunch!)

Method:

Pop your oven on to 200 degrees celsius 
Cream together your butter and sugar 
Crack in your egg
Stir in all the dry ingredients
Add a dash of milk if your mixture is looking dry
Break up all of your chocolate and throw it in, using your hands to get it into the dough
Line 2 trays with baking paper (the cookies will spread in the oven so don't place them close together)
Pick up a 10 small handfuls of cookie dough and place them onto your trays
Pop them into the oven for 11 minutes - I have found this to be the perfect baking time. When you get them out they will not look cooked, it is vital you know this, as it will be very tempting to leave them in for longer and then they'll be hard and overcooked once they are cool. Just take your cookies out after 11 minutes and leave them to cool for about 30 minutes.
Now enjoy a deliciously warm, melt in your mouth cookie with a nice cup of tea!
Share with friends and family (optional)

http://www.tanyaburr.co.uk/?blog=blogs/archive/2015/05/02/my.chocolate.cookie.recipe.aspx
Tanya Burr's Cookies

Okay so here's my thoughts and advice on following this recipe. 
1. I didn't use a Daim bar just milkybar and dairy milk but this is personal choice and they were still chocolaty and sweet enough. I feel when I next make these though I will be experimenting with all the different types of chocolate I can imagine. 
2. The mixture was very dry at first so I did have to combat that by adding quite a bit of milk however that wasn't a problem.
3. When putting these cookies on the tray I would just put them in more of a blob type shape rather than flattening them down, like I did with mine, making them look more flat and typical cookie like and defying the point of the use of self raising flour.
4. You may not need the full eleven minutes, mine were starting to look ready (in the cookie sense, IE still not cooked but done in the oven) around nine minutes and they were fine. 
5. Enjoy and only share I'f  you're in a really good mood!
My Attempt


Okay guys that's my first cookie recipe shared with you all, I may try and make July cookie month so look forward to a new cookie recipe next Friday, In the meantime I'll be back on Monday with a make up Monday post!


If you want to see more baking pictures, feel free to follow me on instagram 

Thursday 2 July 2015

ALOHA!

Hi everyone, welcome to my new blog, I thought I'd share a little bit about myself and let you know about my blog. Hi I'm Carly, I'm a twenty year old, constant worrier, obsessive tea drinker, book lover, chocoholic, pinterest lover, psychology student, fashion obsessed, foodie. Think that about covers it. I originally started my first blog Quirky Mondays in January and feel like it was a great start for my writing but now I feel like I know where I want to take my new blog and feel ready to properly make it exciting and interesting to read. So read away, subscribe away, comment away and I hope you enjoy! 

Carly 
xx

“I can't go back to yesterday because I was a different person then.” 
Lewis Carroll


Carly fell down the rabbit hole Template by Ipietoon Cute Blog Design