Saturday 19 January 2019

Carrot Cake

Hello everyone, long time no see....

I've now entered the world of full time work and my time for baking and blogging has sadly decreased. However I made a new years resolution to get back into it and decided to get cracking.

I made this delightful cake over the festive period based on a recipe by Jane's Patisserie!

I personally think Carrot Cake is great for any season and as the end of the longest month ever and payday (Hallelujah!) rolls around why not get baking!


Ingredients 

Cake
– 225ml Sunflower Oil
– 4 Large Eggs
– 275g Light Brown Sugar
– 300g Grated Carrots
– 100g Raisins (Optional) -  I personally don't use these as I have a decided hatred for raisins.
– Zest of 1 Orange
– 275g Self Raising Flour
– 1 & 1/2 tsp Bicarbonate of Soda
– 2 tsp Mixed Spice
– 1 tsp Ground Ginger
– 1 tsp Ground Cinnamon
– 100g Walnuts/Pecans Chopped (Optional)

Buttercream/Decoration

 250g Butter, room temperature
– 500g Icing Sugar
– 1tsp Vanilla Extract
– Chopped Nuts

Method 


1)  Preheat your oven to 180C/160C Fan and Grease 8″ Cake tins.
2) Pour the Sunflower Oil & Eggs into a large bowl and add the sugar – mix lightly and combine. Add the Grated Carrots & Raisins if using, and Orange Zest and fold through to combine.
3) Add the Flour, Bicarbonate, Mixed Spice, Ginger, & Cinnamon and mix again – try not to over mix! Once combined, fold through the Nuts and pour into the prepared tins!
4) Bake the Cakes in the Oven for 30-35 minutes until cooked through (test with a cake tester, should be clean!) and leave to cool in the tin.
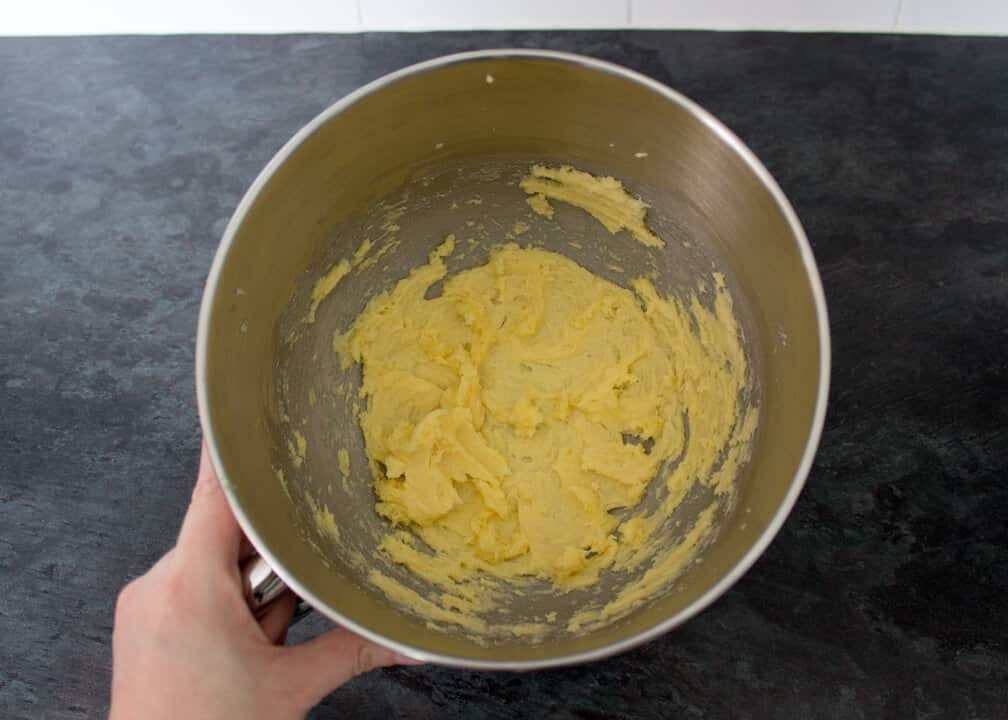
5) Once cooled, make the buttercream – Beat the butter together with icing sugar adding it gradually. I sometimes add a bit of milk to help them combine, only a tiny bit however otherwise the icing will be too soft. Once you have a lovely buttercream consistency add the vanilla extract!
6) Place one of your sponges onto the plate you’re using, spread half of the buttercream on top, add the other sponge, and spread the rest of the buttercream on.

Enjoy and Happy Baking! 

Monday 23 October 2017

Caramel Apple Crumble Tart

Hello again everyone, this recipe turned out amazing, it's taken to an extent from this Jane's patteisere recipe (Jane's Pattiserie), with my own caramel sauce and crumble topping mixed in! My family gave this recipe a very rare 10/10 and even if do say so myself, it's bloody lovely and perfect for autumn! It is a bit longer of a recipe mind so be prepared to have some time to spare but believe me it's so worth it at the end!
Happy Baking
Carly! 


Ingredients 

Caramel Sauce 
200g of granulated sugar.
90g of butter.
120mls of double cream.

Pastry Base
– 175g Plain Flour, plus extra for dusting
– 100g Cold Butter, diced, plus extra for greasing
– 1tbsp Icing Sugar
– 1 Egg Yolk

Pie Filling
– 4 Medium Cooking Apples (Bramley)
– 100g Caster Sugar
– 1/2tsp Cinnamon

Crumble Topping 
100g butter
150g caster sugar
75g granulated sugar.
50g rolled oats.
Nuts to taste.


Method 

1. I began by making my caramel sauce and setting aside in a jug for later. To make the caramel sauce; Pour the granulated sugar into a pan and heat it on a medium heat. The sugar should crystallise and melt, so stir the sugar continuously while it melts making sure it doesn't burn. Then add the butter making sure to be careful as it'll spit and stir for three minutes or so until its totally melted in. Add the cream and stir in slowly until all mixed together, leave to cool.

2. Next make the pastry (taken from the Jane's patisserie recipe) 
To make the Pastry – Sift the flour, icing sugar, and add the diced butter, egg yolk, and 1tbsp of cold water into a food processor. Blitz quickly on the pulse setting until the mixture starts to bind, it shouldn’t take too long at all!

 Grease & flour a Tart/Pie/Flan tin – Roll the pastry mix out onto a lightly floured surface to the thickness of 1-2 £1 coin(s). Press the pastry into the tin and trim & neaten the edges. Fill any gaps of the pastry with any excess pastry so its all covered! Refrigerate for 1/2 an hour! Preheat the oven to 200C/180C Fan – Cover the pastry with baking parchment and fill with baking beans/rice and bake the pastry ‘Blind’ for 15 minutes – remove the parchment and the beans and bake for an extra 5 minutes or until the pastry is cooked through and turning golden! Leave to cool in the tin.
3. I would suggest completing this step while the pastry is in the over. To make the filling I followed Jane's suggestion of peeling, quartering and slicing the apples then laying them out on kitchen roll to dry out. Once the apples were dried I mixed them in a large bowl with the caster sugar and cinnamon. 

4. Next make the crumble topping, to do this rub together the butter, flour and sugar and mix in the oats and the nuts.

5. Fill the baked pastry case with the apples and pour over a 2/3 of the caramel. Sprinkle on the topping then add the rest of the caramel. Bake the pie for 40-45 minutes until the apples are soft and the pie is golden topped and bubbling!

6. Eat and enjoy suggested servings are with lashings oh cream and vanilla ice cream!

Enjoy!

Saturday 7 October 2017

Chocolate Honeycomb Caramel Cheesecake

Hello everyone its been a while but I'm back with a new recipe, this one is a super decadent cheesecake, Enjoy!!


Ingredients 

Caramel Sauce
200g of granulated sugar.
90g of butter.
120mls of double cream.

Cheesecake
1 packet of hobnob (or similar) biscuits.
400g of cream cheese.
100g of butter (melted).
3tblsp of granulated sugar.
100g of Icing sugar (or to taste).
2 Crunchies.
1 large bar of chocolate (200g).


Method


  1. Start by making the caramel sauce, this is quite a runny sauce its still thick but lovely and gloopy! Pour the granulated sugar into a pan and heat it on a medium heat. The sugar should crystallise and melt, so stir the sugar continuously while it melts making sure it doesn't burn. Then add the butter making sure to be careful as it'll spit and stir for three minutes or so until its totally melted in. Add the cream and stir in slowly until all mixed together, leave to cool.
  2. Next begin on the cheesecake, bash your biscuits into crumbs making sure there's no big biscuit chunks and that  you have a bowl of nice chunky crumbs!
  3.  Add in the melted butter and sugar gradually  and mix well, make sure the mixture looks damp throughout but not greasy and soaked, feel free to add more or less depending on how it looks. Pat this mixture into the bottom of a cake tin and thats you! 
  4.  Add to the two tubs of cream cheese in a bowl and add in the icing sugar gradually staring until it tastes sweet, you may not need all of it it's personal preference but its essential to use the icing sugar as it helps set the mixture.
  5. Melt the chocolate and gradually add it into the mixture, again this is to taste.
  6. Mix in around a third of a caramel mixture to the cheesecake mix.
  7. Place the cheesecake mixture on top of the biscuit base, and crumble on top the crunchie bars and pour on another third of the caramel sauce.
  8. Leave in the fridge for around three to four hours then serve, the remaining caramel can be used to serve depending on how much caramel you want! 

Happy baking Carly! xx


Saturday 8 July 2017

Banana and Walnut Loaf

Hi everyone, i've been trying to think of some more summery bakes and I thought tropical or summery fruits and ended up with bananas and with this loaf. I was really craving a banana bread and this one was just beautiful and it has taken a lot of self control not to eat the whole loaf!


The recipe I used was an american one, which I partially adapted, the following are the changes i made...

1. I felt the mixture was too dry with only one egg and used two!
2. I used the plain flour and raising agents like the recipe suggested however reading the comments on the recipe the author stated self raising flour isn't commonly available in the states, so I'm sure self raising flour would work just as well.
3. I used sunflower oil rather than vegetable oil.
4. The recipe says 325 F for an hour, I baked at 160 degrees celsius for 50 minutes and that was perfect.
5. I used a whole 205g of tub of cream cheese for the topping and added icing sugar according to taste.
6. I didn't need the milk or cream as I wanted a thick topping.

Happy Baking! 
Carly x

This amazing recipe has been copied from https://theviewfromgreatisland.com/better-than-starbucks-banana-walnut-bread/


Ingredients 
1 1/2 cups flour
1/2 tsp salt
1/2 tsp baking powder
1/2 tsp baking soda
1 tsp cinnamon
1 cup sugar
1 extra large egg
1/2 cup vegetable oil 
2 tsp vanilla extract
1 cup roughly mashed banana
2/3 cups chopped walnuts, plus more for garnish
frosting
2 Tbsp cream cheese, at room temperature
1 heaping cup confectioner's sugar
1/2 tsp vanilla extract
milk or cream to thin


Instructions

set oven to 325F Spray and line a standard 9x5 loaf pan with parchment paper with long ends. This is so you can lift it out easily for slicing.
Whisk the flour, salt, baking powder, baking soda, cinnamon, and sugar together in a large mixing bowl or a stand mixer. 
Beat in the egg, oil, and vanilla.
Fold in the banana and nuts, and make sure everything is well combined. Turn into the pan and even out the batter. Bake for about an hour, until a toothpick inserted in the center comes out without wet batter clinging to it. (Moist crumbs are fine.) Let the bread cool for 15 minutes in the pan, then remove to a rack to cool completely before frosting.
Blend the cream cheese, sugar, and vanilla with enough milk or cream to make a spreadable frosting. Spread over the top of the cooled bread, Sprinkle with chopped walnuts.

Saturday 24 June 2017

Raspberry Ripple Cake

Hi everyone its been a while but I'm back with this delightful summer cake, which is a recipe of my own making! Its light and fruity and perfect for summer!


Ingredients 
225g butter
150g caster sugar
150g self raising flour
3 eggs 
tsp of vanilla essence 
juice of half a lemon
150g raspberries 
225g of icing sugar 
Splash of milk 
50g of white chocolate 
1tsp of baking powder
3 tbsp of raspberry jam


Method 
1.Pre heat the oven to 180 degrees c 
2. Pop around two thirds of the raspberries in a bowl and blend or mash them, then using a small sieve, squash the raspberries across the sieve, catching the juice underneath to use in the cake.
3. Cream 150g of the butter and sugar together in a separate bowl.
4. Gradually beat in the eggs.
5. Fold in the flour and baking powder.
6. Add in the vanilla, lemon juice and splash of milk.
Sandwiched and ready to ice!
7. Divide the mixture between two greased baking tins, for this cake I used a 19cm cake tin but if you want to make a bigger or deeper can you can just add the mixture. (For every 100 grams of sugar, butter and flour you need two eggs).
8. Make small wells in the mixture and spoon in the raspberry sauce before using a cocktail stick or something similar to twirl the sauce through the mixture. 
9. Bake in the oven till well risen and golden brown, the cake layers should be springy to touch and a stick should come out clean when put through the middle. Approx 20 minutes of baking.
10. To make the icing, mix the remaining butter and icing sugar together, with a splash of milk, though use your discretion with the icing sugar and add gradually and taste as you go. 
11. Melt the chocolate and add this gradually, again tasting as you go, making sure not to overpower the icing with the chocolate.
12. Once the cake layers are cool, spread the jam and some buttercream across the top of one layer and sandwich the two layers of the cake together.
13. I chose to ice my cake all over using a flat palette knife to get a smooth edge but this is totally optional, I then decorated the top with the remaining raspberries. 


 I hope you enjoy this recipe, this a lovely cake and has gone down a treat in my family!

Carly 
xxx

Sunday 7 May 2017

Millionaire's Shortbread

Hey everyone happy Sunday, here's a recipe that I've loved making this weekend and has gone down an absolute storm!


 I got the recipe from kitchen mason and copied and pasted it below, its great and super detailed but from my experience I'd make the following amendments...

1. Bake the shortbread for 20-25 minutes to make it firmer and crunchier.
2. Don't add the chocolate until the caramel has totally cooled as the caramel will begin to burn the chocolate.
3. I used double the chocolate as felt it hardly spread and I wanted a thick chocolate topped layer. 

This recipe is great and has lots of pictures on the original link and I couldn't recommend making it more!
Happy Baking! 

http://www.kitchenmason.com/2014/04/27/millionaires-shortbread/

Here is what you will need to make 12 pieces.
For The Biscuit Base
  • 125g Unsalted Butter
  • 50g Golden Caster Sugar
  • 175g Plain Flour
  • Pinch Salt

For the Caramel
  • 200g Condensed Milk
  • 125g Unsalted Butter
  • 125g Golden Caster Sugar
  • 2 tbsp Golden Syrup
  • 1 tsp Vanilla Extract
  • Pinch Salt

For the Topping
  • 200g Good Quality Milk Chocolate

Equipment
  • 18cm x 28cm Baking Tray
  • Sugar Thermometer (Optional but very handy)

Millionaire’s Shortbread Recipe

Lightly grease & line the base of your baking tray – overhang two opposite sides. (This will help when it comes to getting it out the tray.)
Preheat your oven to 190°C/Fan 170°C.


To make the biscuit base – either in a stand mixer or a large bowl using an electric hand whisk, cream together the butter & sugar until light & fluffy.
Sift in the flour & add the salt. Mix until you get a crumbly dough.
Tip this straight out into the prepared tray, flatten out as evenly as you can then prick the base all over with a fork.
Pop into the oven to bake for about 15-20 mins until just turning golden on top.
Leave to one side to cool whilst you make the caramel.

The Caramel

Add all the ingredients into a large, heavy based saucepan and set over a medium heat.
Stir until the sugar has dissolved then bring to the boil, stirring often.
Once boiling, stir continuously and fairly vigorously. If it catches on the bottom, you will get horrible lumps of burnt caramel running through the mixture.
When it turns a light caramel colour & becomes thick, (or reaches 107°C on a sugar thermometer) remove from the heat and keep stirring briefly just to stop it from catching on the bottom. (The pan will still be very hot.) Pour the thick mixture over the biscuit base, spread evenly and set aside to cool.
Whilst the caramel is setting, we need to make the topping.

Chocolate Topping

Break the chocolate into pieces and chop roughly. Either in a microwave or in a glass bowl set over a pan of barely simmering water, melt gently & stir until smooth and shiny.
If you want to temper your chocolate melt 3 quarters of it in a glass bowl over barely simmering water then heat gently to 45°C. Have a larger bowl/sink of cold water ready.
Once it reaches 45°C, remove from the heat and add in the remaining quarter of chocolate. Place the bowl into the cold water and keep stirring until the chocolate has cooled to 30°C. Be careful not to get any water in the bowl as the chocolate will seize and become unusable.
Pour this over the caramel layer and smooth it out evenly using the back of a wooden spoon.
If you have tempered your chocolate, allow to set completely at room temperature. If you put it in the fridge it will loose that lovely shine you worked so hard to keep. Alternatively, if you are impatient, like me, put it into the fridge to set faster before removing from the tray and cutting into 12 slices.

Friday 28 April 2017

Peanut Butter and Chocolate Biscuit Bars

Hi everyone I'm back with another recipe and this one is super sickly and amazing and a perfect treat for the weekend! It's also very very easy to make!


Ingredients

200 grams of Digestive Biscutis (Crumbs)
200g Icing Sugar 
250g of Peanut Butter (Smooth or Crunchy is fine, I used a mixture)
225g Butter, metled
300g Chocolate (I used milk)


Method 
1. Mix together the digestive crumbs, melted butter, peanut butter and icing sugar. (The icing sugar is to taste and you may need less than the stated amount, so add this gradually and keep tasting!)
2. Pat the mixture into a greased brownie or cake tin.
3. Melt the chocolate and pour over the top of the mixture and pop into the fridge.
4. Once the chocolate has set on top make sure to cut the squares, you don't want to leave it in the fridge too long because it will become too hard to cut and be difficult to get out of the tin. I'd suggest storing them in a cake tin or tupperware rather than the fridge.
Enjoy! 


This recipe was my adaption of the following recipe...
 from http://allrecipes.co.uk/recipe/18871/no-bake-chocolate-peanut-butter-squares.aspx
 

Carly fell down the rabbit hole Template by Ipietoon Cute Blog Design